Strawberry Summer Cake

Strawberry Summer Cake

Yield

12 servings

Ready In:

4-6 hours

About this Recipe

By: Sarah Cegelski

This is the Apffel family’s way of making strawberry poke cake. 

Strawberry Summer Cake

Ingredients

  • 1 boxed yellow cake mix, + the eggs, oil, and water to make it
  • 1 box of instant strawberry Jell-o mix, + boiling and cold water to make it
  • 1 box of instant vanilla Jell-o pudding mix, plus the cold milk to make it 
  • One 16 oz container of frozen sliced strawberries in syrup
  • 1 family-size container of Cool Whip
  • Sliced fresh strawberries, for garnish

Overnight, thaw the frozen sliced strawberries in syrup and the family-size Cool Whip in the refrigerator.

Prepare the boxed cake mix according to the directions on the box in a 9×13 pan. 

While you are waiting cake to bake, prepare the vanilla Jell-o pudding according to the directions on the box. Cover tightly with plastic wrap and refrigerate until read to use. 

When the cake is finished baking, allow it to cool for 15-20 minutes. While you are waiting for it to cool, prepare the strawberry Jell-o mixture according to the instructions on the box. This will involve combining the gelatin with the boiling water and then the cool water, but not refrigerating the mixture. 

Gently poke the cake with a small metal paring knife at one-inch intervals. (I have found this avoids tearing giant holes into the warm cake). Slowly spoon the warm strawberry Jell-o liquid onto the cake, allowing it to soak in. Yes, all of it. Be sure to get all the way to the edges. You might look at it when you are finished and think, this is going to be a mushy mess. I promise, it’s not! Spoon the thawed, sliced strawberries in their syrup over the top of the cake. Yes, all of it. Yes, it is a lot of liquid. Yes, it will look like it’s going to be a mushy mess. I promise, it’s not! Cover tightly with plastic wrap and refrigerate at least one hour. 

Remove the cake from the refrigerator. Carefully spread the vanilla pudding over the top of the strawberries in syrup layer. The strawberries and vanilla pudding will sort of meld together. This is fine. 

Finally, carefully spread the Cool Whip over the top of the vanilla pudding layer until it is completely covered; it’s best to do big dollops of Cool Whip, and then connect them together with a spatula, to avoid the Cool Whip and vanilla pudding layer smushing together. You will not need the whole container, just use enough to cover the top and make it look pretty. (One regular-sized container of Cool Whip is juuuuuust enough and makes it hard to keep the pudding out of the Cool Whip layer.) Refrigerate the layered cake about 2-4 hours, or overnight.

Just before serving, garnish with sliced fresh strawberries so that everyone knows what hides underneath that beautiful fluffy white layer of Cool Whip.

Family Recipes

Family Recipes

Ever since I started staying home with my children, cooking and baking have become a creative outlet and a way to connect with my little ones. Trying new recipes or reimagining old ones is an intellectual and creative challenge I can take on from the comfort of my own home, without having to find childcare and usually without having to spend much money.

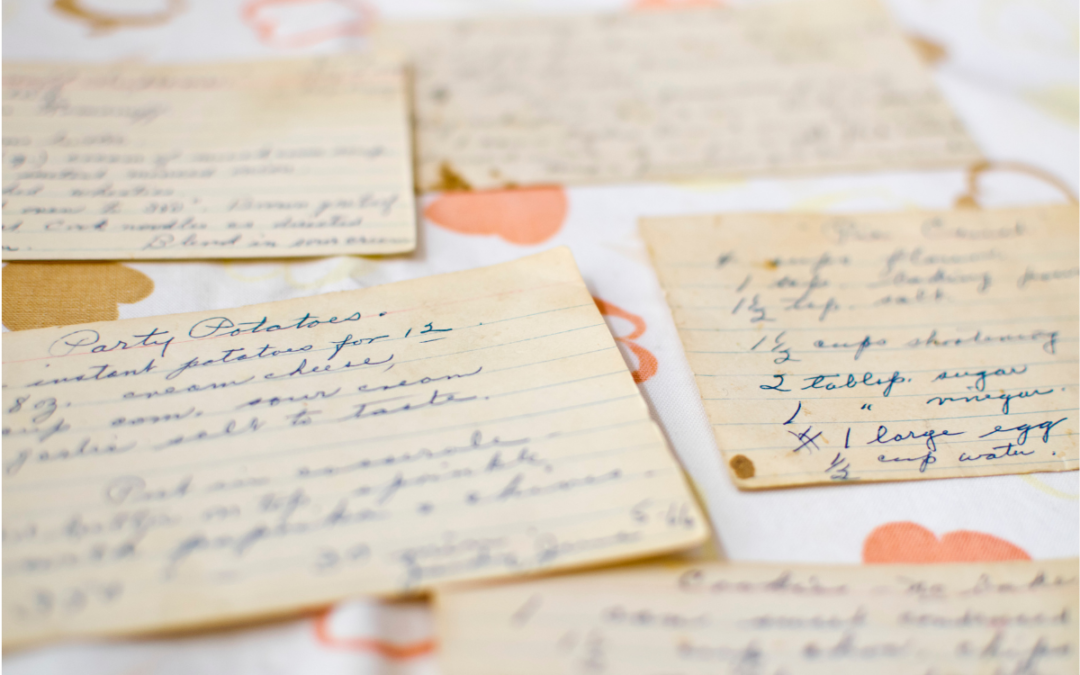
Making some of the recipes from my childhood is a particularly interesting endeavor: it involves reaching out to the family member who made the recipe, interpreting their description of how to follow it, and inevitably challenging myself to make it taste EXACTLY as I remember (which we all know is, 99% of the time, impossible.)

I come from a large extended family. I have one brother and one sister, but I have 21 aunts and uncles, 34 first cousins, and now each year there are more of us as we partner and have children. Communicating with family members to find and understand our “family recipes” has become an unexpected and fun way to connect with relatives I might not otherwise talk to more than once every year or every few years.

Hi! How are you? What have you been up to lately? Do you remember that thing that your mom used to make? Do you have the recipe? Any notes or tips? Thanks! I’ll send you a photo when I make it, and let you know how it turns out. See you at Christmas!

Some of these recipes are homemade and complicated: Italian biscotti, sand tarts, pickled shrimp, stuffed artichokes, turkey gravy. Some are made partly or exclusively from boxed ingredients: strawberry poke cake, fish in red sauce, rigatoni noodles boiled in water with a certain number of chicken bouillon cubes. They are all special, regardless of the time, effort, or number of ingredients they require.

Today I made Strawberry Summer Cake, a staple of summer cousin swimming parties at my Grammy’s pool. It’s basically a strawberry poke cake, made in our family’s particular way, and everything comes from a box or a tub – and it’s delicious. It’s light, creamy, sweet, and addicting. It can be sliced into squares if you let it set up long enough, or served scoop-style in a paper cup or bowl.

I mixed the boxed yellow cake mix, and while it baked, I prepared the other layers: vanilla Jell-o pudding, strawberry Jell-o, strawberries in sugary syrup, thawed cool whip. As I carefully built the layers of the cake, I couldn’t help but experience a flood of memories. Rosy cheeks kissed by the sun, skin that felt tight from the hours of salt-water water skiing and tubing, humid meals on the porch with green astroturf underfoot, giggles and shouts from cousins and babies as we fought for spots to eat with our paper plates damp from the wet beach towels on our laps. My Grammy’s perfectly coiffed hair even in the humidity, and the endless stream of snacks she brought out from the kitchen. PawPaw’s brown leathery skin and white socks with boat shoes, bent over the fish cleaning table as he gutted a freshly-caught redfish or speckled trout. The oppressive summer heat that could only be sliced with box fans and the Gulf breeze as the sun went down and the glow of the porch lights flickered on.

It’s funny what a family recipe can do, besides fill your belly. It’s a thread that connects you to your kin; it’s something to talk about when you haven’t seen each other in months or years; it’s a taste of childhood or maybe your last conversation with a relative. It’s a door to the memories housed in your heart and mind, a window that offers a peek into where you came from. It’s a connection between a delicious manifestation of your family consciousness, and who you are as a unique individual, stirring a bowl of yellow cake mix, today.

You can find the Strawberry Summer Cake recipe here.


Cinnamon Rolls

Cinnamon Rolls

Yield

12 large rolls

Ready In:

6-7 hours

About this Recipe

By: Sarah Cegelski

Adapted from Katie Lee Biegel’s grandmother’s recipe. These rolls are fluffy, bready, cinnamon-sugary perfection. 

Homemade Cinnamon Rolls

Ingredients

Cinnamon Rolls:

  • 1/4 c warm water
  • One 1 1/4-ounce package instant yeast
  • 1 c plus 1 tsp sugar 
  • 1 large egg, lightly beaten
  • 1/4 c vegetable oil
  • 2 tsp kosher salt
  • 1/2 c cold water
  • 1/2 c boiling water
  • 4 c all-purpose flour, plus 1/2 c or more as needed
  • 2 tbsp ground cinnamon
  • 1 stick unsalted butter

Icing:

2 c confectioner’s sugar

4 tbsp milk


Set up your stand mixer with a metal bowl and dough hook. Add the yeast to the bowl and gently combine with one teaspoon of sugar, then add the warm water. Don’t make the water too hot, or the yeast will die. Let it bloom for 5 minutes. If it doesn’t bloom, toss it and start over.

While you are waiting for the yeast, boil the water. In a medium bowl, stir the 1/2 cup sugar, egg, and oil. Add the cold water and stir. Slowly drizzle the boiling water into the mixture, stirring as you go so you don’t scramble the egg. Add this to the yeast mixture and stir until combined. With the stand mixture on low speed, slowly at 4 cups of flour, one cup at a time, until incorporated.

Let the stand mixer knead the dough for about 5 minutes, adding another 1/2 cup of flour or more so that the dough comes together in the bowl and isn’t too sticky. Put the dough in a large, clean bowl and cover with plastic wrap. Let it rise, either on the countertop or in the refrigerator, about 3 hours until it has doubled in size.

Combine the remaining sugar and the cinnamon and set aside. Melt a stick of butter and use 2 tablespoons to grease the bottom and sides of your baking dish or foil pan with a pastry brush.

After the dough is done rising, punch it down a bit, take it out of the bowl and place it on a lightly floured countertop. Use a rolling pin to roll it to a rectangle of about 20 by 10 inches. I like to go a bit larger, around 22 by 12 inches, so that I can cut off the ends that aren’t as pretty before I cut the log into even rounds. If you roll it much bigger than 22 x 12 inches, you will have thinner dough/more layers, which tends to make a drier cinnamon roll. I prefer the fewer, softer layers.

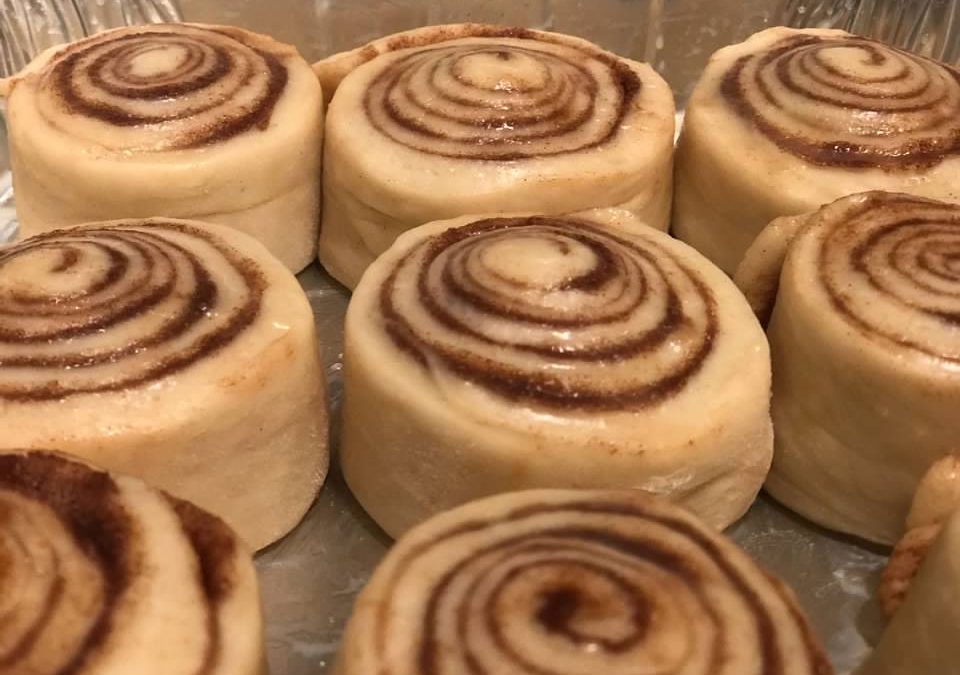
Pour 4 tablespoons of melted butter onto the rectangle of dough and spread evenly, all the way to the edges. Sprinkle the cinnamon sugar mixture on top, again going all the way to the edges. It’s a mess – go with it. With the long edge facing you, roll the dough into a tight log, working side to side like a typewriter. With the seam down, gently squeeze the log seal it. Slice off the uneven ends so you start with a nice, even cylinder. Use a measuring tape to mark off 12, 2 inch rounds (give or take a 1/2 inch each) then slice at the marks with a sharp knife.

Place the rounds, cut-side down, onto the baking dish. Brush the tops of the rolls with the remaining melted butter. Cover the top with plastic wrap and allow the rolls to rise 1 1/2-2 hours. If you want to save them for another day, add a layer of foil over the plastic wrap and put the pan of un-risen rolls into the freezer; the night before you want to serve them, let them thaw and rise on the countertop overnight, then proceed to bake as directed.

Preheat the oven to 350 degrees. Bake the rolls about 35-40 minutes until the tops are golden brown.

While the rolls are baking, make the icing. Sift the confectioner’s sugar into a small bowl so there are no lumps, then add the milk and stir until combined and smooth. When the rolls are finished baking, let them cool for five minutes and then pour the icing on the warm rolls. Serve while warm.

If you want to serve the baked cinnamon rolls at a later time, let them cool and simply cover with foil and warm in the oven later. Or, when cool, wrap in plastic wrap and then foil and freeze. The night before you want to serve them, let them thaw on the countertop overnight, remove the plastic wrap, cover lightly with new foil and warm in the oven. 

The Bathing Suit

The Bathing Suit

I finally bit the bullet and bought myself a new bathing suit.

It was sort of about not wanting to spend the money on myself. But mostly not.

It was really about wanting to wait until I felt worthy of buying a new bathing suit.

As I write this, I have a four-year-old, three-year-old, and ten month old., and my body shows it. I am still 15-20 lbs – I mean, let’s just go ahead and say 20 lbs – heavier than I was before I got pregnant with my third. With the other two, by this point I was more or less back to (my new) normal. Not this time. Exhaustion, tortilla chips at 10 pm, exclusively breastfeeding and putting myself last are the main culprits. My body is wider and softer than ever.

Summer was approaching, and I wanted to take the kids to the beach. I dreaded the thought of it because what on earth would I wear to play in the sand and jump in the waves? I wanted to take them swimming after months of slogging back and forth to swim lessons, but how could I get in the pool with no swim clothes to wear?

So, I googled things like “postpartum swimsuit” and several hours of research and hemming and hawing later, I purchased three to try and kept one that I didn’t completely hate.

Deep breath. I have something to wear that fits my body right now. It’s ok.

It turns out the world didn’t crumble when I bought I swimsuit that didn’t fit the body I wished I had, but rather the one I was living in now. (Imagine that.)

On Mother’s Day, we decided to take the kids to the beach. We threw together towels, toys, and snacks and I went to get myself ready. It felt nice to put something on that fit around my curves. This will do, I thought. Deep breath.

At the beach, the kids had a blast. Everything was covered in sand and I chased my fearless 10 month old around the beach blanket and to the very edge where the waves just barely kissed the sand. It was a messy but truly wonderful beach trip, punctuated by me feeling my body in a swimsuit and not loving it.

I could see the weirdness of it all as it played out in front of me. I felt my heart nearly burst while watching my three babies and my beautiful partner play in the sand, while also being uncomfortable in my body, while also wondering how can I possibly let my body keep me from enjoying the beauty of these gifts?

Toward the end of the stay, I sat damp and sandy-bottomed with my family, took another deep breath of salty air, and told myself: They will remember that Mom took them to the beach, that she played with them in the sand, and watched them jump in the waves. That is what matters most.

I will remember my babies at one of my favorite places in the world, squealing with joy and giddy with ideas for sand structures. I’ll never forget how much my babiest baby loved her first time in the sand and waves. That matters, too.

To be candid, when I look at the photos of that day I will probably also remember the million little battles I fought to get the bathing suit I wore that day, to put it on, and to feel my body in it while we scooped and ran and splashed.

But I will also feel pride because I will remember that I loved my family and myself enough to take the body I had, to play with the family it created, to live out a day I had once only dreamed of.


Hummus

Hummus

Yield

About 4.5 cups

Ready In:

10 min

About this Recipe

By: Sarah Cegelski

Adapted from Ina Garten’s hummus recipe, this version is just as simple and makes enough for a crowd. It couldn’t be easier, and it’s my new go-to dinner party dish!

Hummus Recipe

Ingredients

  • 8 cloves fresh garlic
  • 2 cans garbanzo beans, drained, liquid reserved 
  • 3/4 c freshly squeezed lemon juice (about 4 lemons)
  • 2/3 c tahini (sesame paste)
  • 4 tbsp water or liquid from beans
  • 3 tsp kosher salt
  • Paprika, for garnish
  • Good olive oil, for garnish

Turn on the food processor, fitted with the steel blade. Drain the garbanzo beans and reserve a little bit of the liquid from the can. Smash the garlic cloves and toss them in the processor bowl, along with the drained garbanzo beans. Pulse the processor until they are minced. If the tahini has separated, stir well before measuring. Add the lemon juice, tahini, salt, and water or bean liquid, and puree until the hummus is smooth and creamy. Taste, for seasoning, and adjust salt or liquid to your liking.

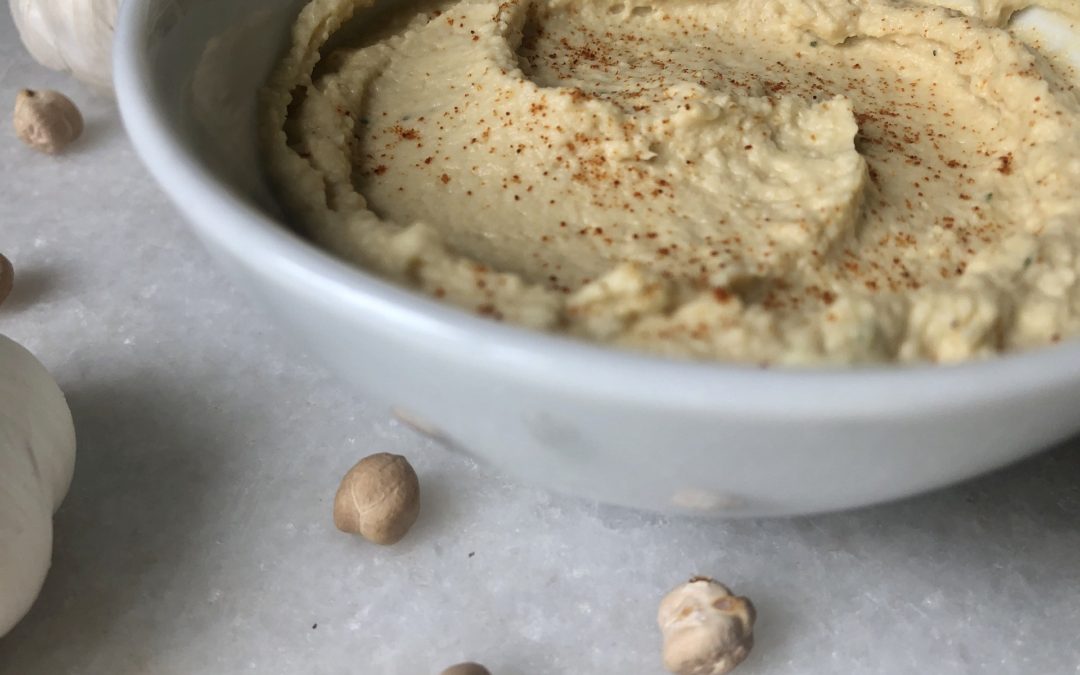
Serve in a large bowl, with a sprinkling of paprika and/or a generous drizzle of good olive oil. Perfect with pita chips or freshly-cut crudités.

Pin It on Pinterest